Quick Reach
What is the WordPress
The WordpPress is an open source blogging platform that is designed to create, write and update a blog in a very easy to use way. The WordPress is a content management system which is based on PHP and MySQL. After downloading and configuring the WordPress you can use the CMS to write the content of your blog or website that includes the text information, images, and videos etc.
Due to its ease and open source nature, many developers across the world use to contribute in its features in the form of WordPress themes, widgets and plugins that are easy to install in your blogs. Many of these WordPress themes, widgets and plug-ins are free, however, others are paid as well.
In this tutorial, we will show you the step by step guide of how to install and run a WordPress blog in the localhost (local machine) as well as in the live mode (yourdomain.com etc.). The topics like WordPress themes, plugins, widgets etc. that require further details are described in their respective chapters. Links to each chapter are given below.
How to install the WordPress
Installing a WordPress blog is made quite easy by web hosting companies these days. You might read “one click installation” of WordPress in the features list of web hosting companies who offer WordPress hosting specifically. We will show you how to install the WordPress in that automatic way as well, let us first go through how to manually install the WordPress.
Install WordPress locally
Follow these steps to install WordPress at your local machine. We are assuming, you have configured the Apache or IIS with PHP support at your local machine. Also, the latest version of MySQL database is also installed. If you have not installed or configured yet then see this guide “How to configure Apache/MySQL” before installing the WordPress.
Step 1: Download the WordPress package
First of all download the WordPress package from the wordpress.org website.

Click on the “Download WordPress” to go to the download WordPress page or “Download WordPress ‘version’” link. It will download the latest version in the compressed file format to your computer. You can also download the previous version of WordPress. However, installing the latest version is recommended.
Step 2: Unzip the package
Unzip/extract the downloaded file. Copy or Cut/paste the WordPress folder inside your desired project folder (for testing purpose, create a “test” folder and paste the WordPress folder there).
The URL in the localhost would look like: http://localhost/test/wordpress
If you want to make the “test” as home page then go inside the WordPress folder and copy all folders and files and paste it in the “test” folder. The URL will become: http://localhost/test/
For the demo, we are using the second way.
This test folder should be inside the htdocs folder (Apache active directory).
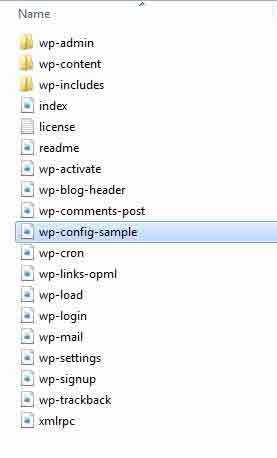
Step 3: Rename wp-config-sample file
Then go inside the “test” folder, where you can see the wp-config-sample.php file. Rename this file to wp-config.php.
Step 4: Configure wp-config.php file
Open the wp-config.php in your favorite editor or the simple notepad. Change the following information in that file.
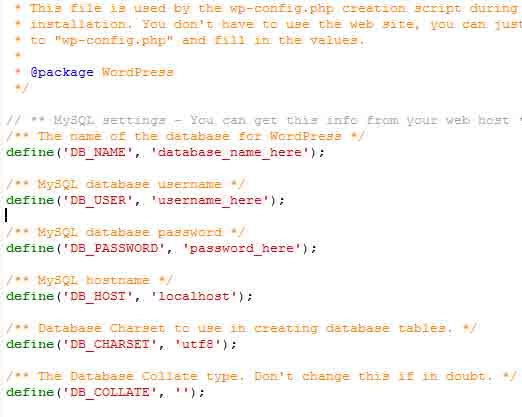
define(‘DB_NAME’, ‘database_name_here’);
Replace the “database_name_here” to MySQL database that you have created for the WordPress. We are using the test_wp database for the demo purpose.
define(‘DB_USER’, ‘username_here’);
Replace the username_here to MySQL user name, for example, we have created the test_wp.
And finally find this:
define(‘DB_PASSWORD’, ‘password_here’);
And change the “password_here” to the database password.
That is it, save and close the file.
Step 4: Run the blog in web browser
Now go to your web browser and type following:
http://localhost/test/
This should redirect to install.php and will ask for some information, as shown below.
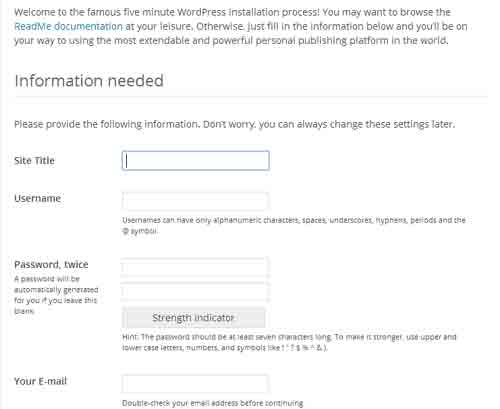
Fill in the blog information like the Title of your website, Username, password, your email and Privacy.
Press “Install WordPress”
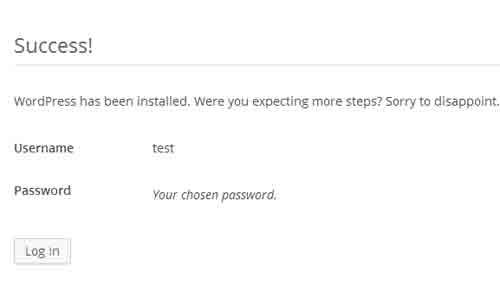
The success screen will be shown along with Login button, as shown in the above graphic.
Click the Login and enter the information, user id and password. You should be able to see the admin panel where you can select the WordPress themes, add plug-ins, widgets and above all start writing the blog content/posts to be published in the localhost and finally over the web.
See following chapters to learn about how to write a blog, installing themes, plugins, widgets.
Install WordPress in the web hosting company
As mentioned earlier, many web hosts come up with the special WordPress features and on top of it is “installing WordPress in one click” kind of package. If you want to learn how to configure with such web host we have written a step by step guide to set up the WordPress. Go to this link for the detailed guide.
However, if you chosen to install the WordPress manually in your web hosting server then follow these steps:
We are assuming that you have a web hosting account with latest PHP and MySQL support. If you haven’t got yet you can read more about web hosting here. The steps are almost the same as setting up in the local machine.
Step 1: Download the WordPress
First of all, download the WordPress package from the wordpress.org website.
Click on “Download WordPress” to go to the download WordPress page or “Download WordPress ‘version’” link. It will download the latest version in the compressed file format to your computer. You can also download the previous version of WordPress as well. However, installing the latest version is recommended due to latest security patches and other reasons.
Step 2: Unzip the package
Unzip/extract the downloaded file.
Step 3: Create MySQL DB in the web hosting server
Go to the admin panel of your hosting company. Go to MySQL database management console. If you have no idea, ask for that information, where to access MySQL management console from the support.
Create a new database that will be used for the new WordPress blog/website. You should know the user id and password of DB as well or ask the support staff of the hosting company.
Step 4: Configure wp-config.php file
Rename wp-config-sample.php file that is inside the downloaded wordpress package. Rename this file to wp-config.php.
Open wp-config.php in your favorite editor or in the simple notepad program. Change the following information in the file.
define(‘DB_NAME’, ‘database_name_here’);
Replace the “database_name_here” to MySQL database you have created for the WordPress.
define(‘DB_USER’, ‘username_here’);
Replace the username_here to MySQL user name of your created database.
And finally find this:
define(‘DB_PASSWORD’, ‘password_here’);
And change the “password_here” to actual MySQL DB database password.
That’s it, save and close the file.
Step 5: Upload the WordPress to your hosting server
If you intend to run the WordPress blog / website from your root domain, you have to upload all the files and folders to the root folder. If this is some other directory, for example:
www.yourdomain.com/blog then you have to create a blog folder inside the root folder.
Connect to your hosting server via an FTP program and upload all the folders and files to the desired location.
After uploading, go to your browser and type in: www.yourdomain.com/ or www.yourdomain.com/blog or whatever the folder name you created where all files are uploaded.
You should be taken to this screen, as shown below:
This will redirect to the install.php and will ask for some information.
Fill in the blog information like the Title of your website, Username, password, your email and Privacy.
After that press the “Install wordpress”
The success screen will be shown along with the Login button, as shown in the above graphic.
Click the Login button and enter the information, user id and password. You should be able to see the admin panel where you can select a theme, add plug-ins, widgets and above all start writing content/posts to be published over the web.
Leave A Comment?